How to typeset two inch photos with 6 inch photo paper
Now, color printers have also come to the home. In the past, you had to go to the photo studio to print identification photos, but now you can do it at home. Special photo paper is required to print the identification photos. We will mainly introduce the arrangement and printing of 2-inch photos on 6-inch photo paper. The size of 6-inch photo paper is 152*102mm, and the size of 2-inch photo paper is 35*53mm, so the 6-inch photo paper can hold 4 2-inch photos. In fact, the use of professional certificate photo printing software will automatically solve the problem of typesetting, let's take a look at the detailed operation process.
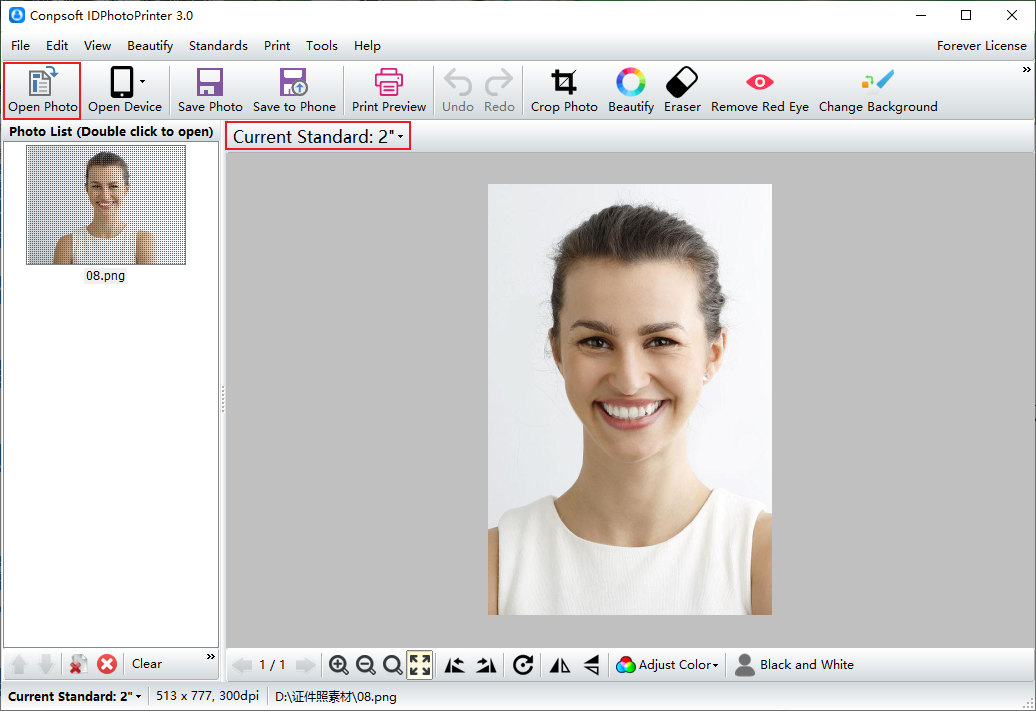
Open the software and select the current size as standard 2 inches. Click to open photos, select a photo from your computer, and add it to the software.
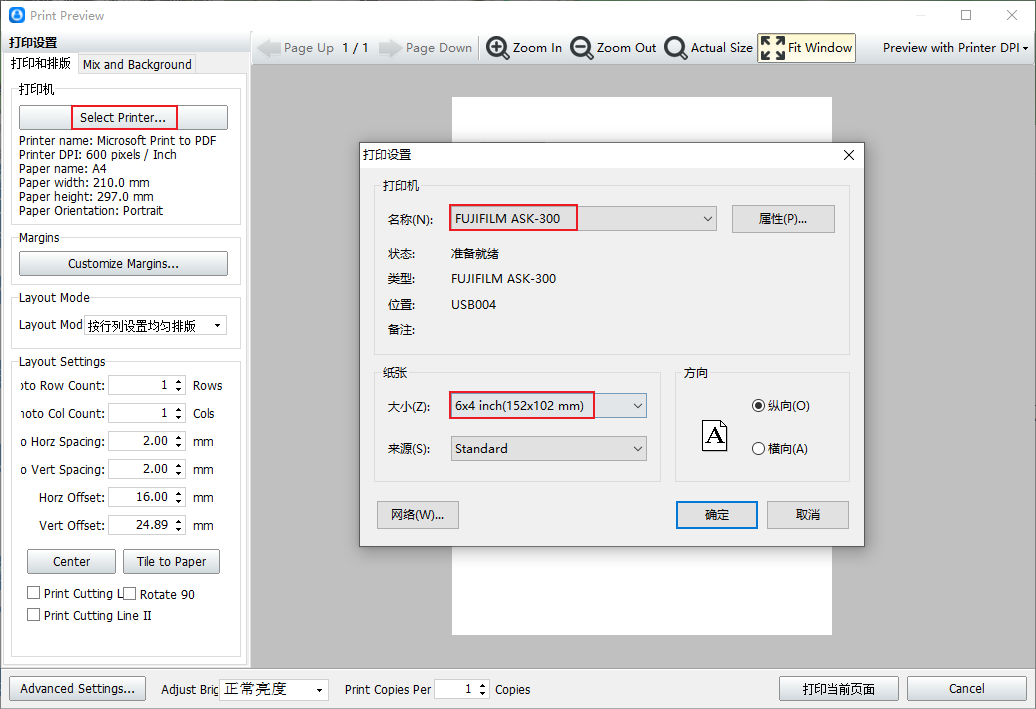
Click [Print Preview], then [Select Printer], select the printer in the print setting interface, and set the paper size to 6 inches.
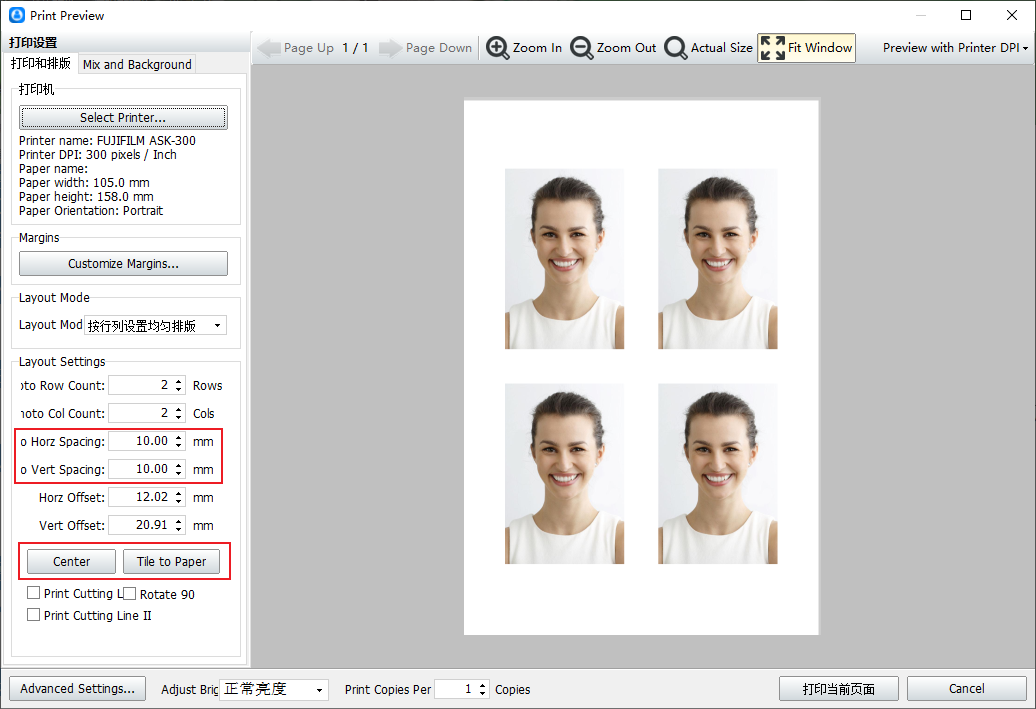
Set the layout of the photo, and then click "Fill the paper", the software will automatically fill the maximum number of photos. You can then set the spacing of your photos.
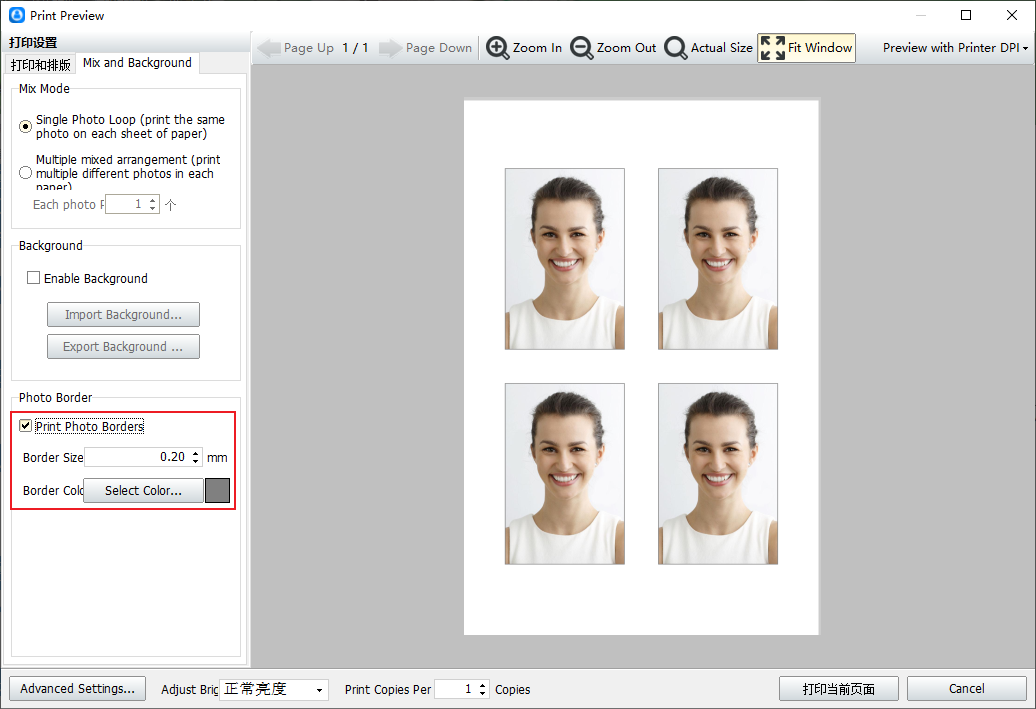
If you want to add a border to your photo, click "Advanced" and then check "Print Photo Border". You can also set the thickness and color of the border. Once the Settings are complete, just hit Print.
This is a quick and easy way to print a 2-inch photo on 6-inch paper. The same method can also be set to print 1 "photos.